

Professional Business Sign Installation – Channel Letters, Monument Signs, Pylon Signs, LED Signs & Storefront Signage
Complete guide to sign installations. Also learn about adding electricity to channel letters, LED signs, monument signs, pylon signs, cabinet signs, and storefront signage – including cost, permits, and automatic on/off controls.
Learn about Electrical Connections, Permits, Photocells & Time Clock Options
Professional Sign Installation Done Right the First Time

Expert installation of outdoor business signs, illuminated channel letters, monument signs, pole signs, cabinet signs, and all commercial signage – fully licensed, insured, and serving the Dallas / Fort Worth area since 1979.
Lighted or Unlighted, Large or Small, you need an experienced team of sign experts to get the job done right.
Installing a business sign is the most critical step. Poor installation leads to leaks, flickering lights, structural failure, and costly repairs. Our own full-time crews – never subcontractors – have installed thousands of channel letters, monument signs, pylon signs, and LED signs since 1979. Every installer is licensed, background-checked, and trained specifically on commercial signage.
We Handle the Entire Sign Installation Process From Start to Finish
From the moment your sign is fabricated, we take over: site survey, permitting, foundation work (if needed), delivery, professional installation, electrical hookup, final cleanup, and photography for your records. You never coordinate cranes, electricians, or inspectors – we do it all under one contract and one warranty.
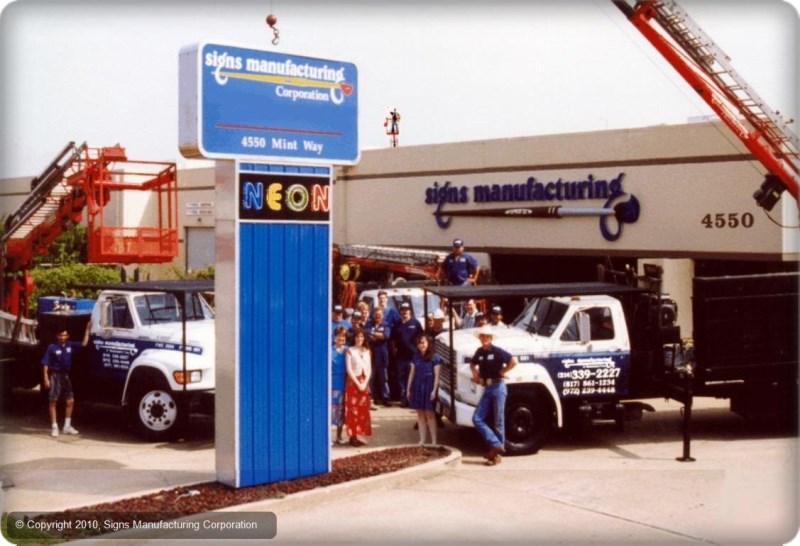
We Own Our Own Fleet – No Delays, No Excuses
We maintain five fully-equipped bucket trucks and crane lifts ranging from 40 ft to 85 ft reach. That means we never wait on rental companies or third-party crane services. Whether you need a simple storefront channel letter set or a 60-foot pylon sign in a busy parking lot, we have the right equipment ready the day your permit is approved.
Licensed Electricians on Every Illuminated Sign Installation
Every lighted sign – channel letters, cabinet signs, LED message centers, and monument signs – is wired and tested by our own licensed sign electricians. Final connections, UL-listed components, and code-required disconnects are handled in-house so your sign passes inspection the first time and stays bright for years.

Constant Communication – You’re Never Left Wondering
You receive text and email updates at every milestone: permit approved, sign shipped to job site, installation scheduled, crew on-site photos, and final “your sign is live” pictures the moment it’s turned on. Thousands of customers since 1979 tell us this is what sets us apart from other sign companies.
Safety First – Fully Insured and OSHA-Compliant Installation Crews
We carry full general liability, workers’ compensation, and commercial auto insurance on every truck and employee. All lifts are annually certified and operators are OSHA-trained. Your property, your customers, and our team are fully protected on every channel letter, monument, or pylon sign installation.
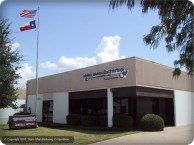
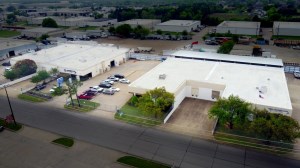
Experience You Can Trust – Installing Business Signs Since 1979
For over 45 years we have been the go-to sign installation company for national brands, shopping centers, municipalities, and local businesses. When you need a perfect, code-compliant, long-lasting sign installation on time and on budget, you’re in the safest hands in the industry.
Running Power to Signs – Electrical FAQ
Answers to the most common questions about electrical permits for signs, who runs power to illuminated signs, cost to add electricity to a business sign, and how we make it simple for you.
Do illuminated signs require a separate electrical permit?
Yes — in almost every city in the U.S., running new electrical service to a sign requires a separate electrical permit from the building/sign permit. The only common exception is when the connection is within 6 feet of an existing power source and we perform the final hookup (this is usually covered under our sign permit).
Who is responsible for running power to my new sign?
You have three easy options:
1. We handle everything (recommended) – we coordinate or perform the electrical work so you have only one point of contact.
2. Your own licensed electrician runs the new circuit and we make the final connection.
3. For most storefronts, power already exists directly behind the wall — we simply tie in (no extra permit needed in most cases).
How much does it cost to run electricity to a business sign?
Typical costs in 2025:
• If power is already behind the wall (90% of storefronts): $0 – included with your sign installation
• New circuit 10–50 ft from the panel: $850 – $2,200
• Trenching or long runs across parking lots: $2,500 – $8,000+
We always give you an exact price after a quick site survey or photos.
Is power already available behind the wall in most retail spaces?
Yes! The vast majority of shopping centers and storefronts were pre-wired with a junction box or conduit directly behind the sign band or parapet. In these cases, we simply pull from that existing source — no additional electrical permit or cost in most municipalities.
Can you connect the sign if my electrician runs the new circuit?
Absolutely. Your electrician just needs to terminate in an accessible junction box within 6–10 ft of the sign location. We’ll make the final connection, test everything, and handle the inspection.
How long does the electrical portion add to the project timeline?
• If power exists behind the wall: 0 extra days
• New circuit with our in-house electricians: usually adds 3–10 business days
• Using your own electrician: depends on their schedule (we work around it)
Do LED signs or channel letters use a lot of electricity?
No — modern LED-illuminated signs are extremely efficient:
• Typical 4' × 8' channel letter set: ~$8–$18 per month
• Large LED message center: $25–$80 per month
Much less than old fluorescent or neon signs.
Do you offer photocell or timer options so the sign turns on/off automatically?
Yes — every illuminated sign we install includes a photocell (dusk-to-dawn) or Wi-Fi timer at no extra charge. You can also control it from your phone with optional smart controls.
Running Power to Your New Business Sign – We Make Electrical Simple and Safe
Most retail storefronts already have power behind the wall for illuminated signs, channel letters, and LED signage. When power exists within reach, we connect your new sign at no additional charge. If a new circuit is required for your outdoor business sign, monument sign, or pole sign, we offer full-service electrical installation by our own licensed electricians. You get one point of contact for the entire sign project – from design and permitting to final electrical connection and inspection.
Automatic Photocell and Time Clock Options for Business Signs – Included at No Extra Cost
Every illuminated sign we install – including LED channel letters, cabinet signs, and digital message centers – comes standard with an automatic controller. Choose a photocell (dusk-to-dawn sensor) so your sign turns on at sunset and off at sunrise, or a programmable digital/Wi-Fi time clock that meets city curfew requirements (common for signs that must turn off at 11 PM or midnight). Both options save energy, extend LED life, and keep your business signage code-compliant without any effort on your part.
Important: Have Your Electrician Call Us Before Running Power to the Sign
If you prefer to use your own electrical contractor to run a new circuit for channel letters, monument signs, or any illuminated business signage, please have them contact us first. A quick 5-minute call ensures they install the correct voltage (120V or 277V), proper breaker size, UL-listed sign whip, and termination point exactly where the sign permit requires. This prevents failed inspections, costly rework, and delays on your storefront sign or outdoor business sign project.
Why Experience Matters for Sign Electrical Installation and Power Connection
Sign-specific electrical work is different from standard building wiring. Proper installation requires knowledge of wind-load conduit support, NEC sign disconnect rules, UL-listed components, and local amendments for outdoor business signs. As a fully licensed and insured sign company since 1979, we specialize in electrical for channel letters, monument signs, pylon signs, LED signs, and all types of commercial signage. Our electricians know every local inspector and guarantee first-time approval on sign electrical permits.
Peace of Mind – Let Us Handle All Electrical and Power for Your Business Sign
When you choose our complete turnkey service for your illuminated business sign, you get one company responsible for design, fabrication, permitting, electrical installation, final connection, and inspection. No coordination between multiple contractors, no surprise charges, and no risk of code violations. Thousands of businesses have trusted us since 1979 to deliver fully powered, code-compliant storefront signs, monument signs, and LED signage that simply work – from day one.
Literature
We believe we are the only sign company that offers informative literature on signage, our "Sign Buyer's Guide" series.
Our most popular Guides are:
52 Page Brochure

44 Page Brochure

40 Page Brochure

40 Page Brochure

40 Page Brochure

40 Page Brochure

Also Available
Also Available
 |
|
104 Product Videos |